Introduction If you're lucky enough to have some free hours in these uncertain times, there are a lot of ways you could spend them. How about learning how to develop your own film? Or maybe developing film is an activity you tried long ago and one you'd like to jump back into.
After all, the smell of fixer singeing the nostrils can be quite an intoxicating/nostalgic aroma (Please do not smell the fixer).
What follows is a quick and easy home developing guide that'll cover everything from supplies, to chemistry dilutions, to proper cleanup. So turn down your record player and grab a good old fashioned pencil and paper to take notes [glances at the sun dial] – it's developing time!
Reasons to develop at home
But first, if you still need convincing, here's are some solid reasons to take the plunge into the wild DIY world of home developing:
1. It's cheaper to set up a home developing kit than you may think. I was able to get everything I needed from a local brick and mortar store for ~$150. Obviously a lot of stores are closed right now, but you may pay even less sourcing items online, or second hand.
2. Home developing is a hands-on experience that makes you better appreciate both the magic of photography and the wonder of chemistry. There's something really cool about seeing the image creation process from start to end. In short, you'll feel a bit like a mad scientist.
3. If you are paying a lab to develop and scan your images right now, setting up a home lab can be a cheaper option in the long run. And even if labs are closed (as many are at the present time), you'll still be able to process your own images.
4. It feels good to learn something new / do it yourself.
Best films to start with
For the sake of this article, we'll concentrate on developing B&W film, as the process is easier to learn than it is for color. B&W film also tends to be more forgiving to exposure errors than color. . . not that you'll make any!
Some good B&W films to start with include Kodak Tri-X, Kodak T-Max, Ilford HP-5 Plus and Ilford Delta 400. Be aware, there are B&W film stocks out there that are meant to be developed in color chemistry, like Ilford XP2. Avoid these.
Chemistry 101: The developing basics
The process of developing film is actually quite straightforward. We'll go into more detail further into this article, but the basic steps go like this: Load your film into a lightproof tank and pour a series of chemicals in one after another, then wash, dry and scan.
The two main chemicals involved in the process are developer, which does exactly what it sounds like, and fixer, which stabilizes the film after development. A stop bath rinse is done between the developing and fixing stage and a water rinse is done at the end.
What you'll need to assemble your home mini lab
Here's what you'll need to set up your home developing kit: Concentrated developer, fixer and stop bath (optional - plain old water also works). Liquid concentration is easier to work with than powder and is also safer as there's no chance of particulate inhalation. You'll also want a wetting agent like Kodak Photo-flo (this is also optional but I find it helps negatives dry without watermarks), a developing tank with reels*, several plastic bottles to mix your dilutions in, measuring beakers, a funnel, a thermometer, a stop-watch/timer and a film squeegee. Many photography stores carry all these items.
You'll also want a light-proof bag to load your reels, as well as a bottle opener and a sharp pair of scissors. The former is to pry open the film canister the latter is to cut the film (both while in the bag). Film clips are great for drying, but clothespins work well too. You'll also want plastic sleeves to store your negatives in once dried.
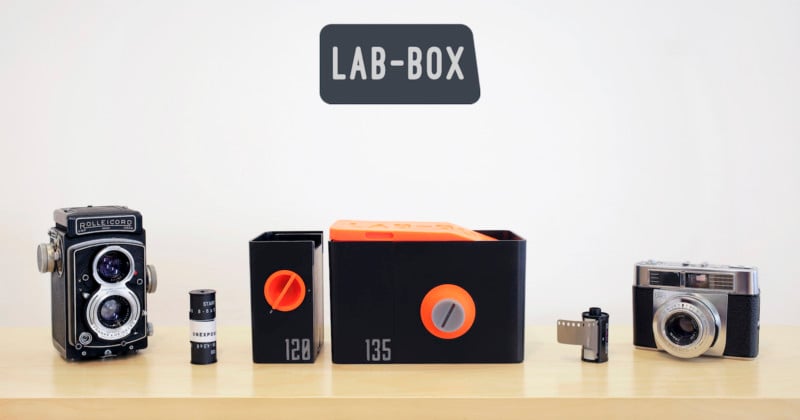
*For those wishing to avoid the developing tank, all-in-one options like the the Lab-Box, may be your cup of tea. We can't vouch for its ease of use, but our pals over at Pop Photo seem to like it.
Loading film onto reels
There are a handful of companies that make film tanks and reels. In general though the plastic reels are MUCH easier to load than the metal ones. Of the popular plastic brands, I've found that Paterson Universal makes the easiest to load reels (avoid Omega brand reels).
Once you've got your tank, I recommend practicing loading your reel with the lights on. Yes you will need to sacrifice a roll of film to do this, but it's worth it. Here are the basic steps/tips for loading:
1. Pop open your film canister from the bottom using a bottle opener. It should not take much to pry the bottom cap off.
2. Pull the film and spool out of the canister and trim off the film leader so that the roll ends in a straight cut line.
3. Insert the freshly-cut end of the film roll into the reel. On a Paterson Universal reel the side in which you load the film is flat and the side it feeds out of is rounded; this makes it easy to load correctly in the dark. Once inserted, hold each side of the reel in either hand and gently twist the opposite direction until the reel hits a stopping point, then twist back; this should advance the film onto your reel one frame at a time.
4. Count in your head how many times you do the above twisting action. When you get to 32 (assuming you're loading a 36 roll frame) unroll the rest of the film from your spool and cut it free - there's usually a small piece of tape attaching it.
5. Proceed to load the last of the film.
6. Insert the reel onto the tank's center column. Remember if you're only developing one reel to still use two reels in the tank with the loaded one on bottom.
The developing process - mixing up the chemistry
Mixing up photo chemistry requires very little knowledge of chemistry itself. If you can follow the directions required to bake a cake, you can certainly mix up these chemical dilutions with no trouble.
As mentioned, we recommend purchasing concentrated liquid chemicals and some plastic containers to store your dilution in (make sure the containers are photo chemical safe). Most chemistry comes with basic dilution guidelines printed on the bottle. For example I use Ilford Ilfotec DDX Developer, which requires a 1:4 dilution. Conveniently, this is the same dilution as the Ilford Rapid Fixer I use.
When mixing up chemistry I like to make 60 fl oz of diluted developer, fixer and stop bath. This is roughly 3x times the amount of each chemical I need to process two rolls in my Paterson tank. Because I don't develop too often, I just pour the dilute chemistry back into its respective container after I'm done. The chemistry eventually expires, but it takes many rolls to get there. I also find it extremely helpful to write down the date and dilution of each chemical on its container.
Once you have all your chemicals mixed up and in separate jugs, it's time to bust out the timer and get processing!
Developing, stopping, and fixing
Printed on the bottom of most film tanks is how much fluid is required, depending on the number and/or type of film you are processing. My tank requires about 22 fl oz for two 35mm rolls of film.
It's also important to figure how long you'll need to develop your film for. Many manufacturers include a list of developing agents and developing times on the inside of the film box. But if you tossed the box, worry not, the Massive Dev Chart is here to help. The temperature of the chemicals also affects developing time, so it's good thing you got that thermometer!
Below are the basic steps for processing your roll:
1. Pre-wash: This isn't completely necessary but there's no harm in washing your film before moving on to the chemistry.
2. Developing time: Measure out your developer into a beaker and use the thermometer to find its temperature. The colder the developer, the longer the processing time. For instance if I'm processing a roll of Ilford HP-5 Plus in the aforementioned developer/dilution, I'm looking at nine minutes of developing time if the chemistry is 20 C / 68 F and closer to seven minutes if its 24 C / 75 F. Obviously if it's warmer or colder than that range, you can estimate your development time accordingly.
3. Developing: Start your timer, pour in the developer, attach the tank's cap and shake gently for 30 seconds. After the first 30 seconds let the tank sit on the table, then shake for ten seconds at the start of each minute of developing. Tap the tank on the table after shaking each time to ensure there are no air bubbles.
4. Stop-bath: Pour out your developer, pour in your stop bath dilution and replace the cap to the tank. Shake the tank for about ten seconds and then let it rest on the table for an additional 30 seconds (don't forget to tap for air bubbles). Pour the stop bath out and pour in your fixer.
5. Fixer: Repeat the same shaking, tapping and resting process as you did with the developer for the fixer for 4-5 minutes. Then pour out the spent fixer and fill your tank with fresh water. . .
Washing, drying and storing negatives
6. Washing part 1: Once filled with fresh water, give the tank a good two minutes of shaking, then pour out the water. Repeat this process several times. Note: your film is fully-developed and light-safe at this point.
7. Washing part 2: Twist off the top of the tank and let water run into it for five to ten minutes.
8. Wetting agent: Dump out a little water, add a few drops of a wetting agent to the tank and screw the top back on (with cap attached). Shake for about five seconds and remove the screw top.
9. Removing the film and squeegeeing: Remove your reels from the center column of the tank and twist in the same way you did when loading them, but do so beyond the initial stopping point. This should allow you to pull either side apart. Grab one end of the film and run a wet squeegee over it once or twice.
10. Drying: Hang your film using clothespins or clips somewhere it won't be disturbed. Give the negatives about 12 hours to dry before cutting and inserting it into plastic film sleeves.
Cleaning up
It probably goes without saying, but photo chemicals are toxic and you should avoid dumping them down the drain at all costs. Likewise, it's important to keep your work space clean and tidy. I personally like to work on a piece of plywood on saw horses that I break down each time after I'm done processing. This avoids getting chemistry on my work desk or kitchen table.
Of the chemicals used for home developing, photo fixer presents the most environmental issues. Fortunately there are places happy to take it off your hands (for a small fee). Spent fixer contains valuable liquid silver which can be removed and recycled. Spent developer and stop bath can be taken to most household hazard waste processing locations. If you're unsure of the best way to dispose of chemicals, contact a local photo lab and ask for their recommendations.
Scanning/digitizing
Once your negatives are dried it's time to digitize them. There are numerous ways to scan film and varying opinions about which methods are best. I personally use an Epson V-series scanner that can do 12 frames of 35mm in one go. These scanners are reasonably-priced, fairly quick to scan and offer decent output - read our Epson V600 review.
Another fairly-easy scanning methods involves using a camera and macro lens, diffused light source and some sort of film holder like the Pixl-latr or Nikons's ES-2.
Conclusion: Tips for success
As is the case with anything DIY, there's going to be a large degree of trial and error involved in your process. I've tried my best to lay out all the basics that I've learned over the years, but it should got without saying that your mileage may vary.
That said, here's a few final tips to help you succeed, based on my own trial and error:
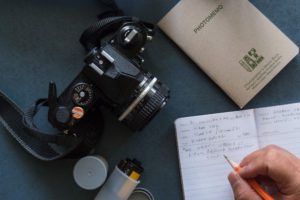
1. Write down each step of the developing process as it pertains to your chemistry and the kinds of film you shoot. You'll find yourself referencing this every time you go to develop.
2. Try your best to avoid getting finger prints on the film while loading and opt to load in a proper lightproof bag over a seemingly dark room.
3. Don't be skimpy with the fixing time. If the film spends a little too much time in the fixer it won't have any real negative impact, but too little will.
4. Give your film enough time to dry or it'll get stuck in the plastic film sleeves.
5. Accept dust as a natural part of the life of a film shooter.
6. Consider wearing gloves unless you like the smell of fixer on your fingers for days (I do).
That pretty much sums up our home developing guide! If there's something crucial you feel we've left out, or if you have any additional tips, feel free to mention them in the comments below. Happy developing!
Want more analog fun? Check out the DPReview Film Photography Forum.
. dpreview.com2020-4-1 15:00